Lightbox
Lightbox is a way to integrate Checkout that allows your users to complete the payment without leaving your website.
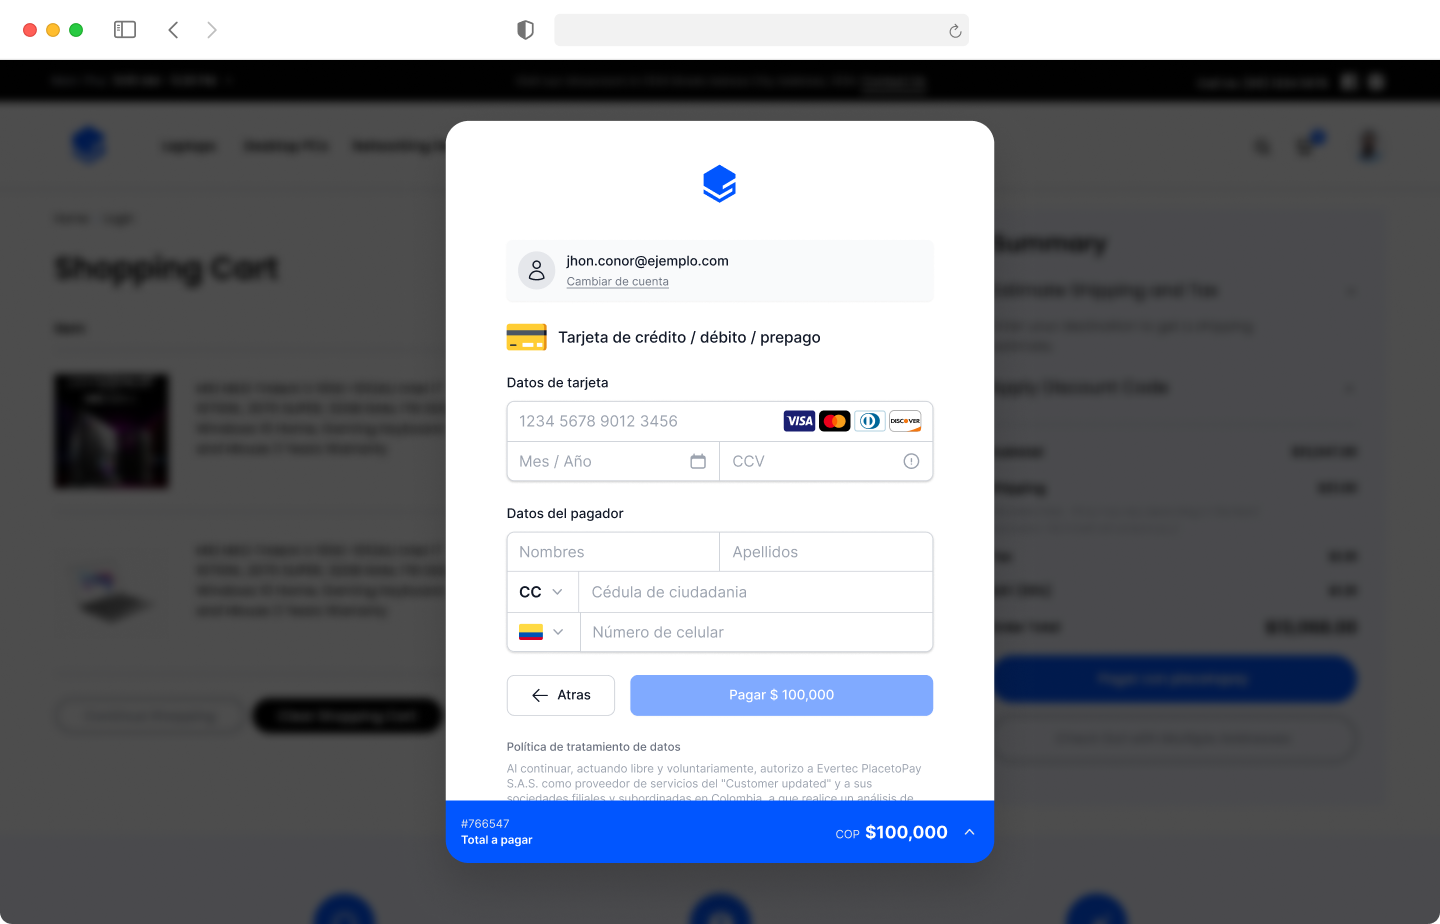
When you use Lightbox, Checkout appears dynamically in the center of the screen, offering a reduced and integrated checkout experience on your website.
This solution allows you to keep users on your website or application by providing them with convenience and facilitating the payment process.
Integration
Follow these steps to complete your integration successfully.
- Add Script: Include the Lightbox script in your web page.
- Generate Process URL: On your server (backend), create a session and obtain the
processUrl. - Start Lightbox: Share the
processUrlwith your client's (frontend) JavaScript code. Use this URL to initialize the Lightbox. - Register Callback: Capture the callback in your frontend to handle the response when the Checkout process ends.
Add script
To integrate Lightbox, you must add our script to your web page. This script is essential as it provides the necessary functionality to open and manage the Lightbox, allowing users to complete their payments without leaving your website.
The script contains the code required to create and control the Lightbox interface. It also ensures that your integration is compatible with the latest features and updates provided by Placetopay.
<head>
	...
    <script src="https://checkout.placetopay.com/lightbox.min.js"></script>
</head>
The url referenced in the script can change according to the country and commercial provider with which you are integrating.
Content Security Policy (CSP)
If you implement a Content Security Policy (CSP) in your application, it is essential to allow the domains used by Webcheckout to ensure the proper functioning of the payment gateway.
If you define only a default-src, this directive will act as the default value for all other missing directives. Therefore, it is important to explicitly add the domains used by Webcheckout.
During session processing, the following domains must be included in your CSP configuration:
This is an example of a CSP configuration that allows the use of Webcheckout on the International instance:
Content-Security-Policy: default-src 'self'; script-src 'self' *.placetopay.com; connect-src 'self' your-domain.com *.placetopay.com; img-src 'self' your-domain.com *.placetopay.com; frame-src *.placetopay.com;
Generate Process URL
To generate the processUrl, you need to Create a session on your server. The response will contain the processUrl field, which you need to send back to the browser.
Start Lightbox
Share the process url processUrl with your client's (frontend) javascript code. Once it is available you can start the Lightbox.
// Example URL
var processUrl = "https://checkout.placetopay.com/spa/session/76300/90443d4926a2...";

// When available, call
P.init(processUrl);
A lightbox containing the checkout page will be open on the user's browser, the user will be prompted to enter the payment details and complete the process.
It is likely that the user's browser does not support starting the process in a lightbox.
For these cases, our library will handle redirecting the user to the processing URL, as it works in a traditional integration.
Redirecting is the default behavior; however, you can change this behavior by defining the backupTarget property. Learn more in Alternative access to the processing URL.
Register Callback
To make integration seameless, when the checkout process ends whithin the browsers lightbox session, a "callback" function will be issued to your web page vía javascript, make sure to capture it to aknowledge that the session has finished.
This will help you detect that the user has finished the process, then you must use your business logic and your backend services to fetch the actual data and continue with your application flow.
// Register your callback
P.on('response', function (response) {
	// your business logic
	console.log(data);
});
The callback will have the response argument in which you will find the structure of a MerchantNotificationRequest with the following information:
SessionNotification
{
	"reference": "ABC_123",
	"requestId": 12345,
	"signature": "bodySignature",
	"status": {
		"date": "2023-07-11T11:34:37-05:00",
		"message": "The request has been successfully approved",
		"reason": "00",
		"status": "APPROVED"
	}
}
You must listen to the message and validate the signature to ensure that the information comes from Placetopay. Then, you can use the status to update the information in your system or requestId to query the transaction status on your server.
Learn more about how to handle this message in Notification.
There were recently changes to the signing algorithm used in the notification. Learn more in Migration to SHA-256.
Advanced Integration
Know in detail the methods and events available
P.init
Initialize the Lightbox.
P.init(processUrl, options);
P.on
Subscribe to lightbox events.
P.on(eventType, callback);
Event listing
P.on('response', function (response) {
	console.log(response);
});


P.on('close', function () {
	console.log('The user closed the Lightbox');
});
It is also possible to subscribe to more than one event of the same type, you just have to register each one separately in P.on().
Alternative access to processing URL
If the lightbox cannot be opened normally, the alternative access to the processing URL will depend on the backupTarget property passed to the lightbox configuration. The alternatives are:
The backupTarget property can be passed as an optional parameter when initializing the lightbox.
P.init(processUrl, {
	backupTarget: 'self' // default
});
Embedded use
If you want to use the lightbox in an iframe, you must prepare your application to catch the placetopay-lightbox:redirect message and redirect the main window to the URL that is available in the payload. This to support Safari and other browsers that by default do not allow third-party cookies.
The received postMessage will have the following structure:
{
	"type": "placetopay-lightbox:redirect",
	"url": "https://checkout.placetopay.com/spa/session/123456/1234567890..."
}
You have to catch the message and redirect the main window to the URL that is available in the payload.
window.addEventListener('message', (event) => {
	const data = typeof event.data === 'string' ? JSON.parse(event.data) : event.data;

	if (data.type === 'placetopay-lightbox:redirect') {
		window.location.href = data.url;
	}
})
Integration example
Below is the simplest example of how you can integrate Lightbox into your HTML.
<!DOCTYPE html>
<html lang="es">
<head>
	<meta charset="UTF-8">
	<title>Lightbox SDK</title>
	<script src="https://checkout.placetopay.com/lightbox.min.js"></script>
</head>
<body>
	<h1>Lightbox SDK</h1>

	<button id="open">Open Lightbox</button>

	<script>
		<!-- Suscribe el evento close -->
		P.on('close', function () {
			alert('The user closed the Lightbox');
		});

		<!-- Suscribe el evento response -->
		P.on('response', function (response) {
			console.log(response);
		});

		<!-- Abre el Lightbox al hacer click en el botón -->
		document.getElementById('open').addEventListener('click', function () {
			var processUrl = "https://checkout.placetopay.com/spa/session/123456/1234567890abc1234567890abc12345";

			P.init(processUrl);
		});
	</script>
</body>
</html>